Professor Portmatt's Lab
[[Category:]]
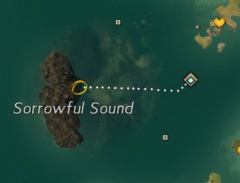
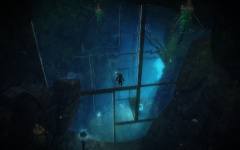
Professor Portmatt's Lab (Лаборатория профессора Портматта) - это прыгательная головоломка в западной части Bloodtide Coast.
Содержание
Прохождение[править]
| Искать на YouTube видеоруководства о Professor Portmatt's Lab. |
- Enter the cave through the middle panel which opens every few seconds.
- Destroy either of the unnamed objects on either side of the cave (they look like bigger versions of the attack turrets). You may want to destroy the one further from the repair golems.
- Left of the shimmering gate is an unnamed console. The following must be completed before the repair golems fix the turret. You want to cannibalize it using the following steps:
- Press Okay → Yes → Yes. Do not close the dialogue window.
- Wait for it to give you more options → choose "no" (Second option).
- Wait until it cycles, then cycles again and offers a choice with a green arrow. Quickly → choose "Abort auto-abort." (First option)
- If you then wait a while it will lower the gate inside and open up a portal. Do not step near this portal until it is calibrated or it will suck you in.
- Go to the three panels to the right of the gate and set them to show the sequence:
14:xx:xx – 49.xxx – 0.02xxx; it doesn't matter what appears in the "x" digits. - Enter the portal. If step (4) was done correctly, you will be teleported to Test Platform 325 near a Magnificent Chest (which is in fact on the "roof" of that cavern, above water level). Otherwise, you will end up somewhere else in the zone. Only the person who set up the panels will reach the chest via the portal. He should be the first person, and the only person, to enter the portal at this time.
- When you reach the chest, you can submit the correct coordinates using the console there, back to the 3 panels down below; those at the other end must accept those coordinates (i.e. open a panel and simply "Receive" the numbers, which should be already correct) and do nothing else after, except to use the portal — any additional use of the nearby console will prevent this from working. {{verify|see talk page -- some people believe this no longer works, while others point out that people might be missing for other reasons.
Solving the coordinates[править]
The panels to the right of the gate will shift the three coordinates in certain directions based on the option chosen. The numbers will shift in loops; meaning if the first coordinate is already at its lowest register and a player chooses an action that will decrease it further, the coordinate will instead cycle to "wrap around" to the top and highest value. Therefore it is impossible to decrease all coordinates to their lowest register and to start from there.
An easy and quick way to solve the coordinates is to use the bottom and middle panel until you do NOT see any of the 3 coordinates needed. Then activate the first choice of top panel once or twice until you see one or more of the coordinates you're looking for. If you repeat this process, the 3 numbers will align when using the top one after several tries.
| First Option | Second Option | |
|---|---|---|
| Top Panel | + + + "Trim revulators."
|
- - - "Increase cyclospringer frequency."
|
| Middle Panel | + + - "Enhance anti-grav field fabrication."
|
- - + "Reduce rampulative induction."
|
| Bottom Panel | - + - "Throttle primary drive redoubler."
|
+ - + "Boost magneto-harness magnitude."
|
Possible numbers[править]
The possible numbers you can set the console to are below. The correct coordinates are marked in green.
| Position 1 | Position 2 | Position 3 |
|---|---|---|
| 2:56:10 | 28.444 | 0.01576 |
| 8:19:37 | 49.251 | 0.02285 |
| 14:32:19 | 65.470 | 0.03903 |
Complete solution[править]
The following table shows exactly which buttons to hit for each possible starting combination.
Position 1 is the top header, position 2 is second down, and position 3 is along the left.
The buttons are labeled Top/Mid/Bot + a number, for instance "Top2" means top panel, 2nd option.
| Position 1 | 2:56:10 | 8:19:37 | 14:32:19 | ||||||||||||||||||||||||
|---|---|---|---|---|---|---|---|---|---|---|---|---|---|---|---|---|---|---|---|---|---|---|---|---|---|---|---|
| Position 2 & 3 | 28.444 | 49.251 | 65.470 | 28.444 | 49.251 | 65.470 | 28.444 | 49.251 | 65.470 | ||||||||||||||||||
| 0.01576 | Top1 | Mid2 | Bot1 | Top2 | Mid2 | Bot2 | Mid2 | Top1 | Top2 | Bot1 | Bot2 | Top1 | Mid1 | Bot2 | Top2 | Mid1 | Mid1 | Bot1 | |||||||||
| 0.02285 | Top2 | Mid1 | Bot1 | Mid1 | Bot2 | Top1 | Mid1 | Top2 | Mid2 | Mid2 | Bot1 | Top1 | Mid2 | Bot2 | Top2 | Bot2 | Finished! | Top1 | Bot1 | ||||||||
| 0.03903 | Bot1 | Top1 | Bot2 | Top2 | Mid1 | Top1 | Mid1 | Bot1 | Top2 | Mid1 | Bot2 | Mid2 | Bot2 | Top1 | Mid2 | Top2 | Mid2 | Bot1 | |||||||||
If it's hard to comprehend how to use the table you can try this JavaScript (credit goes to user gubbinsmcgee from Reddit).
Changing numbers one at a time[править]
This table demonstrates how to change one number at a time.
| - Position 1 | + Position 1 | - Position 2 | + Position 2 | - Position 3 | + Position 3 |
|---|---|---|---|---|---|
| Middle, First Option | Middle , Second Option | Top, First Option | Top, Second Option | Top, First Option | Top, Second Option |
| Bottom, Second Option | Bottom, First Option | Bottom, First Option | Bottom, Second Option | Middle, Second | Middle, First |
Non-solution locations[править]
The following is a list of all possible inputs with corresponding teleport locations. Coordinates are listed using only the main components, for example, "2:56:10 --- 65.470 --- 0.03903" is written here as "2, 65, 03"
| Coordinates | Result |
|---|---|
| 2, 28, 01 | Underwater, inside the west edge of the Destroy Psylithium Generators to free Quaggan prisoners event area, amongst hostile mobs. |
| 2, 28, 02 | Underwater, south-west of Sorrowful Waypoint - on the north edge of the Quaggan event area. |
| 2, 28, 03 | Underwater, directly east of Sorrowful Waypoint. |
| 2, 49, 01 | On water surface north-west of the Aquanarium Hydropost Point of Interest (POI). |
| 2, 49, 02 | On water surface east of Aquanarium Hydropost POI. |
| 2, 49, 03 | Next to Creator Zee at the Stormbluff Isle renown heart. |
| 2, 65, 01 | On water surface north-west of Aquanarium Hydropost POI. |
| 2, 65, 02 | On a small cliff above Creator Zee (a little east of the renown heart on Stormbluff Isle). |
| 2, 65, 03 | Top of the lighthouse on Stormbluff Isle - be very careful when jumping off![1] |
| 8, 28, 01 | Same room. |
| 8, 28, 02 | Ocean floor, south-east of Vonooroovah POI. |
| 8, 28, 03 | Underwater, in the middle of the big building at Vonooroovah. |
| 8, 49, 01 | On water surface just east of Sorrowful Sound island. |
| 8, 49, 02 | On water surface just south-west of Vonooroovah POI. |
| 8, 49, 03 | Next to Bram Dawnrazer (renown heart) north-east of Sorrowful Waypoint. Potential for hostile mobs. |
| 8, 65, 01 | On water surface, just off the north-east edge of Sorrowful Sound island. |
| 8, 65, 02 | On water surface above Vonooroovah village. |
| 8, 65, 03 | South of Professor Maciver, next to the Broken Beacon POI. Potential for hostile mobs. |
| 14, 28, 01 | Same room. |
| 14, 28, 02 | Underwater, south-west of Aquanarium Hydropost POI. |
| 14, 28, 03 | Underwater, just outside the cove at Laughing Gull Island. |
| 14, 49, 01 | On water surface just off the south-east corner of Sorrowful Sound island. |
| 14, 49, 02 | Solution. |
| 14, 49, 03 | On top of a boat just out from the cove at Laughing Gull Island. |
| 14, 65, 01 | (Same as 14, 49, 01) |
| 14, 65, 02 | On water surface south of Sorrowful Sound (halfway to Laughing Gull Island). |
| 14, 65, 03 | Midair in the cove at Laughing Gull Island.[2] |
Footnotes[править]
- ↑ This is the only way to reach The lighthouse location and it is difficult to get down from safely. There are three options: 1) The second highest platform, on the south-west side of the lighthouse, is safe to land on and it is simple to hop down from there. Note that the highest platform is angled enough to slip and hence someone attempting to land on this platform falls all the way to the ground and dies. 2) The other option is to jump towards the water (facing south-west) and hold forward the whole way down. A speed boost will help to make the water, but is not required. 3) Use a waypoint.
- ↑ The spawn point is high enough in the air to push your character underwater.
Примечания[править]
- Несмотря на то, что эта зона относится к прыгательным головоломкам, в ней не придется прыгать. Это, скорее, плавательная головоломка.
- Прохождение первой части (смотри пункт #3), до починки големов, занимает больше времени. Однако, если вы слишком долго пытаетесь пройти вторую часть - вам придется начинать все сначала.

